1.
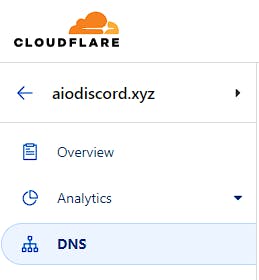
Go to your DNS Registrar - E.G Namecheap, Google Domains, Namecom etc....
For this example i will be using Cloudflare
2.
Locate your DNS Records

3.
Add an "A Record"

With the following information
| Name | IPV4 Adress |
| Subdomain or @ to use the whole domain | your servers IPV4 Adress |

4.
You will need to be able to access your servers terminal for these following steps
$  sudo apt update

$  sudo apt install apache2
List the ufw application profiles by typing:
$ sudo ufw app list
You will receive a list of the application profiles:
Output
Available applications:
  Apache
  Apache Full
  Apache Secure
  OpenSSH
As indicated by the output, there are three profiles available for Apache:
Apache: This profile opens only port 80 (normal, unencrypted web traffic)
Apache Full: This profile opens both port 80 (normal, unencrypted web traffic) and port 443 (TLS/SSL encrypted traffic)
Apache Secure: This profile opens only port 443 (TLS/SSL encrypted traffic)
5.
Enable the following Apache Modules
$  sudo a2enmod proxy
$  sudo a2enmod proxy_http
$  sudo a2enmod proxy_balancer
$  sudo a2enmod lbmethod_byrequests
Restart Apache
$ sudo systemctl restart apache2
6.
Configuring our webserver

$ cd /etc/apache2/sites-available
Once you run
lsyou should see 000-default.conf

Copying the default configuration
$ cp 000-default.conf dashboard.conf
nano dashboard.conf
Edit the default configuration to the below configuration
<VirtualHost *:80>
        # The ServerName directive sets the request scheme, hostname and port that
        # the server uses to identify itself. This is used when creating
        # redirection URLs. In the context of virtual hosts, the ServerName
        # specifies what hostname must appear in the request's Host: header to
        # match this virtual host. For the default virtual host (this file) this
        # value is not decisive as it is used as a last resort host regardless.
        # However, you must set it for any further virtual host explicitly.
        #ServerName www.example.com

        ServerName yourdomain.com
        ProxyRequests On
        ProxyPreserveHost On

        ProxyPass / http://localhost:8080/ # <-- Change the port if your bot is running on a different port
        ProxyPassReverse / http://localhost:8080/

        # Available loglevels: trace8, ..., trace1, debug, info, notice, warn,
        # error, crit, alert, emerg.
        # It is also possible to configure the loglevel for particular
        # modules, e.g.
        #LogLevel info ssl:warn

        ErrorLog ${APACHE_LOG_DIR}/error.log
        CustomLog ${APACHE_LOG_DIR}/access.log combined

        # For most configuration files from conf-available/, which are
        # enabled or disabled at a global level, it is possible to
        # include a line for only one particular virtual host. For example the
        # following line enables the CGI configuration for this host only
        # after it has been globally disabled with "a2disconf".
        #Include conf-available/serve-cgi-bin.conf
</VirtualHost>
Press
CTRL + XorCommand-Xfor Mac then press Enter to save changesNow run the following command
$ a2ensite dashboard.conf
$ systemctl reload apache2
7.
Setting up our Discord application redirect
Go to discord.dev and go to your application -> Oauth2 -> General
Add 2 Redirects with the following contents

important -> Change http and https depending if you have SSL or not!
8.
Now you should be able to access and login to your bots dashboard!
Optional: Setting up SSL
certbot.eff.org/instructions?ws=apache&..
 Written by River
CEO @ AIO Tech Ltd
CEO @ Seven Seas Hosting

